-
Style In Form Nesting Table Hairpin
Original price was: $429.00.$349.00Current price is: $349.00. -
West Bros Serra King Walnut Bed
Original price was: $3,499.00.$2,799.00Current price is: $2,799.00. -
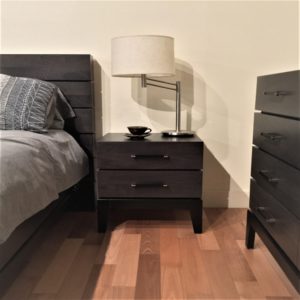
TH Definity Walnut Night Table
Original price was: $1,499.00.$1,199.00Current price is: $1,199.00. -
Ren-Wil Tupper Picture
Original price was: $549.00.$399.00Current price is: $399.00. -
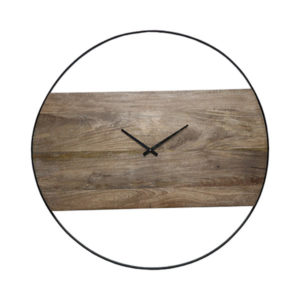
Renwil Amika Clock
Original price was: $619.00.$489.00Current price is: $489.00. -
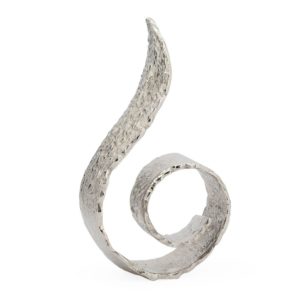
Torre & Tagus Flame Sculpture
Original price was: $159.00.$119.00Current price is: $119.00. -
Citak 5X8 Rug Arctic Thatch
Original price was: $599.00.$449.00Current price is: $449.00.


How to Adjust a Saw Swing for Perfect Cuts?
Adjusting a saw swing is crucial for achieving perfect cuts. John Harris, a leading expert in the saw-swing industry, emphasizes, "Precision in saw swing adjustments can transform your woodworking." Without proper adjustments, even the finest saw can produce uneven edges and splintered wood.
Each saw has its characteristics. A slight misalignment can lead to significant issues. Imagine preparing a beautiful tabletop, only to discover flaws from an improper swing. This is frustrating for both beginners and seasoned professionals alike. It's essential to regularly check the saw swing. Doing so will help avoid mistakes that can derail a project.
Take the time to learn about your saw's swing mechanism. Experiment with small adjustments during practice cuts. The goal is to find that sweet spot for smooth operation. Reflect on the results and adjust again, if necessary. Understanding these nuances is vital in mastering the art of woodworking.

Understanding the Importance of Proper Saw Swing Adjustment
Adjusting the saw swing is crucial for achieving precise cuts. A proper saw swing ensures the blade moves smoothly along the intended path. Misalignment can lead to uneven or jagged edges. It can also waste materials, costing time and effort. Recognizing this importance can save frustrations during projects.
When setting the swing, check the angle carefully. Sometimes it feels right, but looks can be deceiving. A small adjustment can make a significant difference. Often, a visual inspection reveals misalignment. However, measuring with a protractor or an angle finder showcases discrepancies better. Don't rush; take your time and ensure everything is just right.
Improper adjustments can be hard to spot. A cut may seem fine initially but can cause issues later. Reflect on previous projects that went awry. Were there signs of poor swing settings? Learning from those instances leads to improvement. Each mistake offers a lesson. Embrace the process of refining your technique for better outcomes.